User interface
This section shows how to use ModuleStudio. Starting with a general demonstration of the user interface it goes step by step through all UI functions and explains their purpose. Note there is also a dedicated chapter showing a list of keyboard shortcuts which are helpful not only, but especially for advanced users.
Basic usage
ModuleStudio organises its models in projects. A project is simply a folder within the workspace directory. Each project in ModuleStudio consists of three files:
- a
*.mostappfile which stores the actual application model; - a
representations.airdfile containing data for how the model is displayed in the different editors; - a
.projectfile for project meta data.
You can always have only one project opened. If you create a new application or open a project, this causes the currently opened project being closed.
The mostapp file is the primarily important one for storing and exchanging applications. It can imported into a new ModuleStudio project at any time, so you do not need to keep the representation file with it.
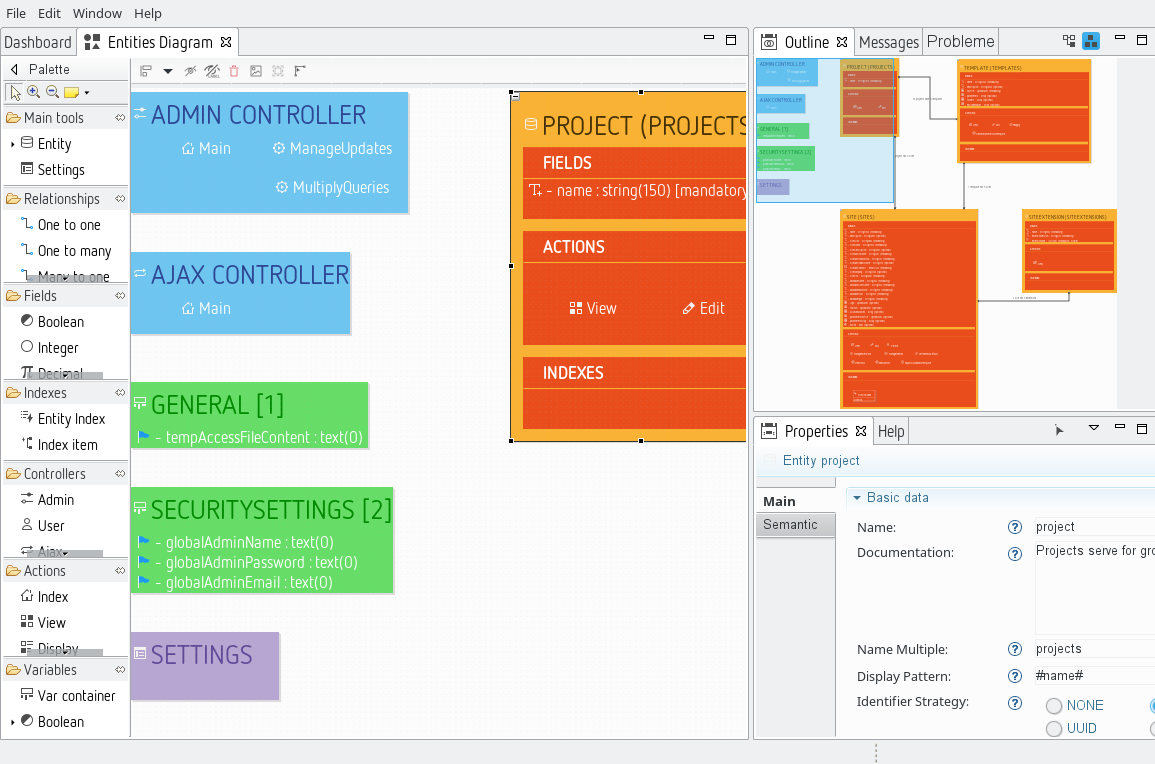
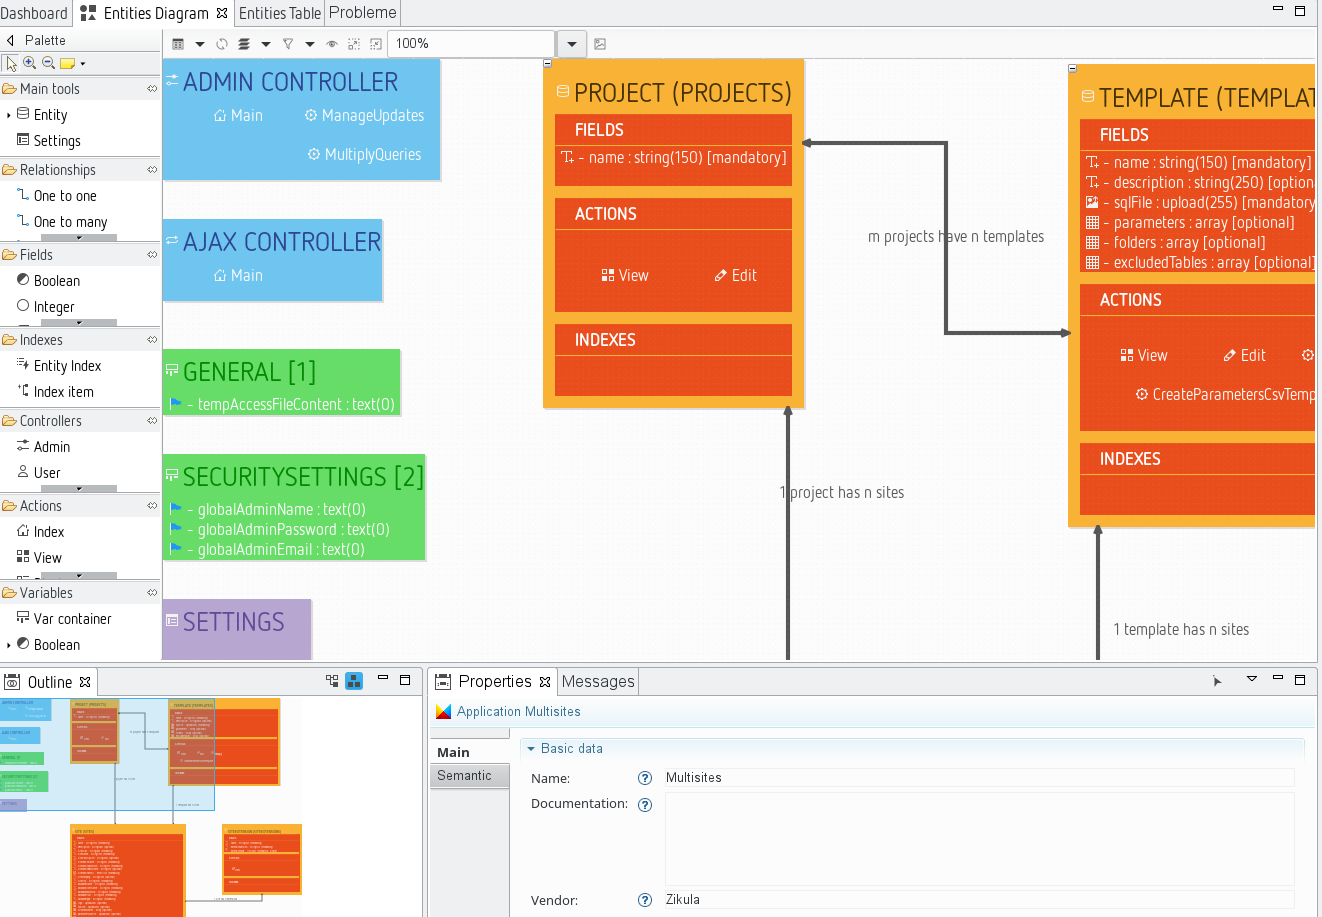
Besides the main menu, the environment can be split into two areas.
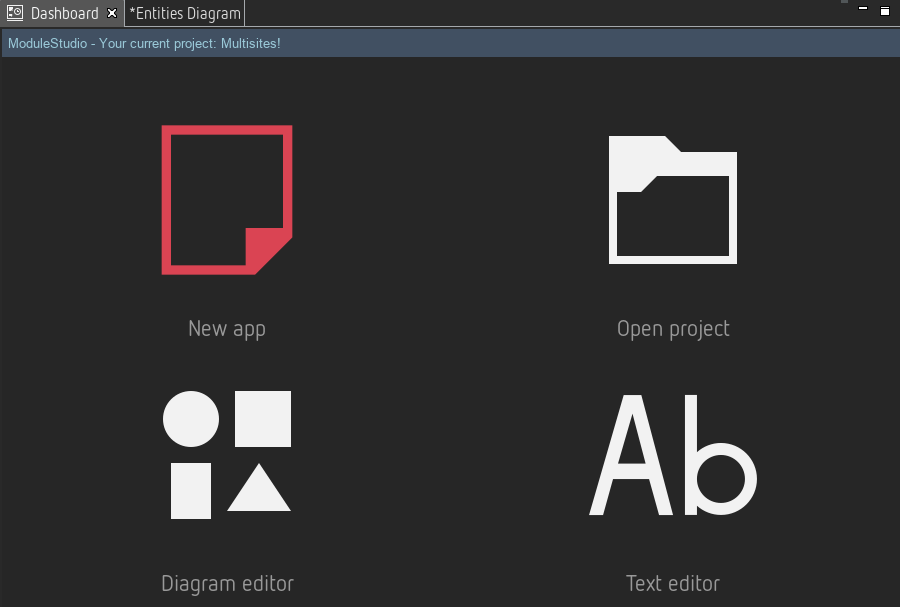
- On the left side there are the dashboard view and the editor windows. The dashboard view provides you some quick links to commonly used actions from the main menu; more details are described in the views chapter. Editors contain the actual notation for changing the model. For the diagram editor this consists of a canvas as well as a palette with the available tools. This is where the actual modelling happens. The diagram editor’s palette separates the available model elements into several groups, like Relationships, Fields or Actions. It is possible to have multiple elements at the same time in one model for each of these types. The visible groups and tools in the palette depends on which layers you have enabled in the diagram. More about these layers will be explained later.
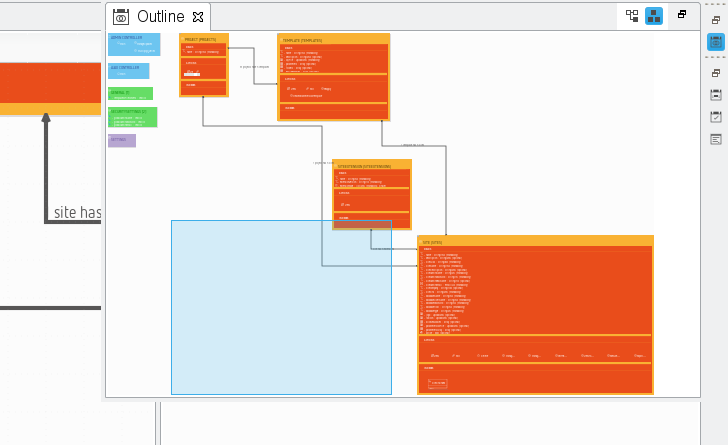
- On the right side is an arrangement of different views. For example there is an outline view with a miniature display of the editor window and a properties view used to edit properties of model elements. You can change the views in multiple ways, for example you can close, reopen, resize and move them. All these different possible actions are described below.
Main menu
File menu
The file menu contains actions about handling model files and projects.
 New application - Starts the wizard for creating a new model project. After you finished the wizard, a new project will be created. If you had another project opened before doing this, it will be closed.
 Open model - Displays a sub menu for different ways to open existing models. This sub menu contains the following items:
 Open project - Displays a dialog for selecting an existing project to open. This dialog contains a list showing all projects which are located in your workspace. If you want to open a project from another location you need to import its model file into a new project which is described in the next action.
 Import model - Displays a dialog for selecting an existing
 .mostappfile to be imported into a new project. Models from earlier versions are automatically migrated.
 Validate diagram - Allows to trigger the validation for your current model manually.
 Generate application - Starts the generation process for creating application source code from your current model.
 Copy project - Duplicates the currently opened project using a new name.
 Delete project - Deletes the current project from the workspace. This action can not be reverted.
 Close - Closes the current editor. This is the same as clicking on the cross symbol on the top right of its heading tab. If you need the editor again you can reopen it using the Window main menu or the dashboard view.
 Close All - This closes all open editors at once.
 Save - Saves the current editor.
 Save All - This saves all open editors at once.
 Print Preview - Displays a print preview dialog.
 Print… - Displays the printing dialog.
 Page Setup… - Displays a dialog for adjusting the page setup for printing.
 Exit - This closes ModuleStudio.
Edit menu
The file menu collects actions regarding working with model element amendments.
 Undo - Reverts the last action. So if you think you made something wrong or unwanted, you can just undo it.
 Redo - Repeats the last action which has been reverted before. If you have undone an action, but want it again, you can “undo the undo”.
 Cut - Moves selected element(s) into the clipboard.
 Copy - Copies selected element(s) into the clipboard.
 Paste - Paste element(s) from the clipboard.
 Delete - Deletes selected element(s) from the model. More information about this can be found here.
 Select All - Selects all available elements.
 Deselect All - Deselects all elements. This results in an empty selection.
Window menu
In the window menu you can find actions about managing editors, views and preferences.
 Editor - Displays a sub menu for options with regards to the current editor. This sub menu contains the following items:
 Toggle Split Editor (Horizontal) - Enables/disables horizontal split of the editor window. This causes that the editor window has two areas (top and bottom) with a separator between. In both areas you can navigate independently allowing you to look at different areas of your model at the same time.
 Toggle Split Editor (Vertical) - Enables/disables vertical split of the editor window. This causes that the editor window has two areas (left and right) with a separator between. In both areas you can navigate independently allowing you to look at different areas of your model at the same time.
 Clone - Clones the editor window. This adds a second window containing the same editor again. You can arbitrarily arrange both windows.
 Appearance - Displays a sub menu for options with regards to the application’s appearance. This sub menu contains the following items:
 Toggle Full Screen - Enables/disables a full screen mode.
 Editors - Displays a sub menu for opening the different editors. This sub menu contains the following items:
 Open diagram - Opens the diagram editor.
 Open text - Opens the textual editor.
 Views - Displays a sub menu for opening the different views. Helpful if you closed one and need it back. This sub menu contains the following items:
 Open dashboard - Opens the dashboard view.
 Open error log - Opens the error log view.
 Open outline - Opens the outline view.
 Open properties - Opens the properties view.
 Open problems - Opens the problems view.
 Switch theme - Changes the current theme.
 Preferences - Opens the preferences dialog.
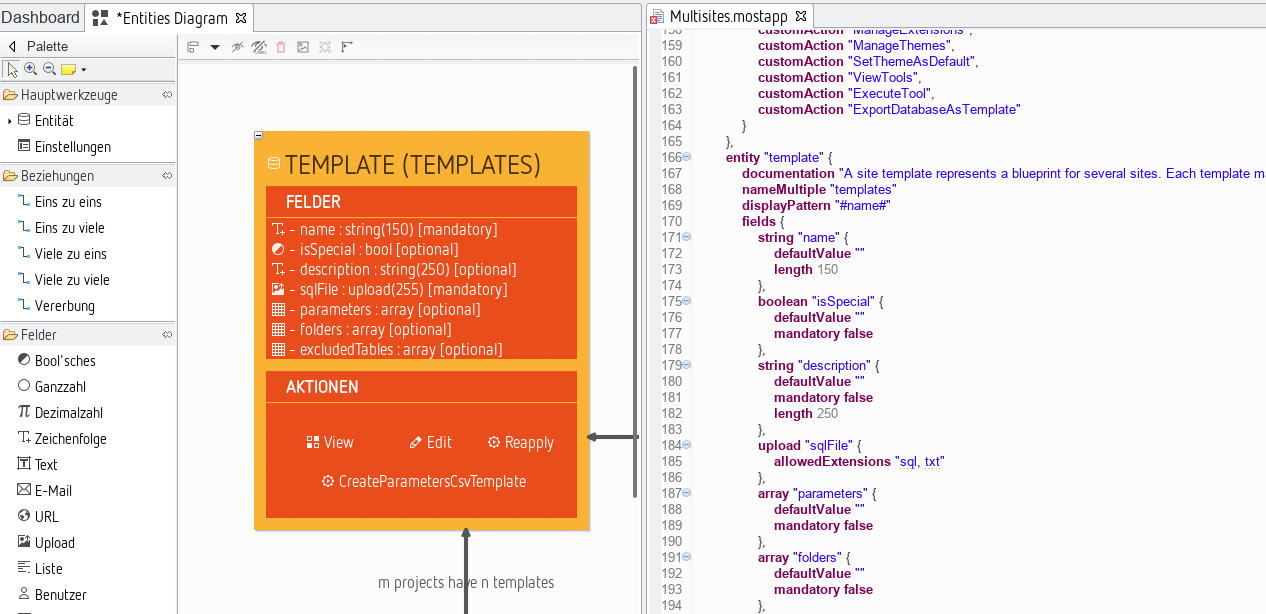
Themes
ModuleStudio offers two different themes: light and dark. You can change the current theme by either the Window > Switch theme main menu entry or using preferences.
While all images in this manual use the light theme, the following image features the dark theme to show you the contrast.
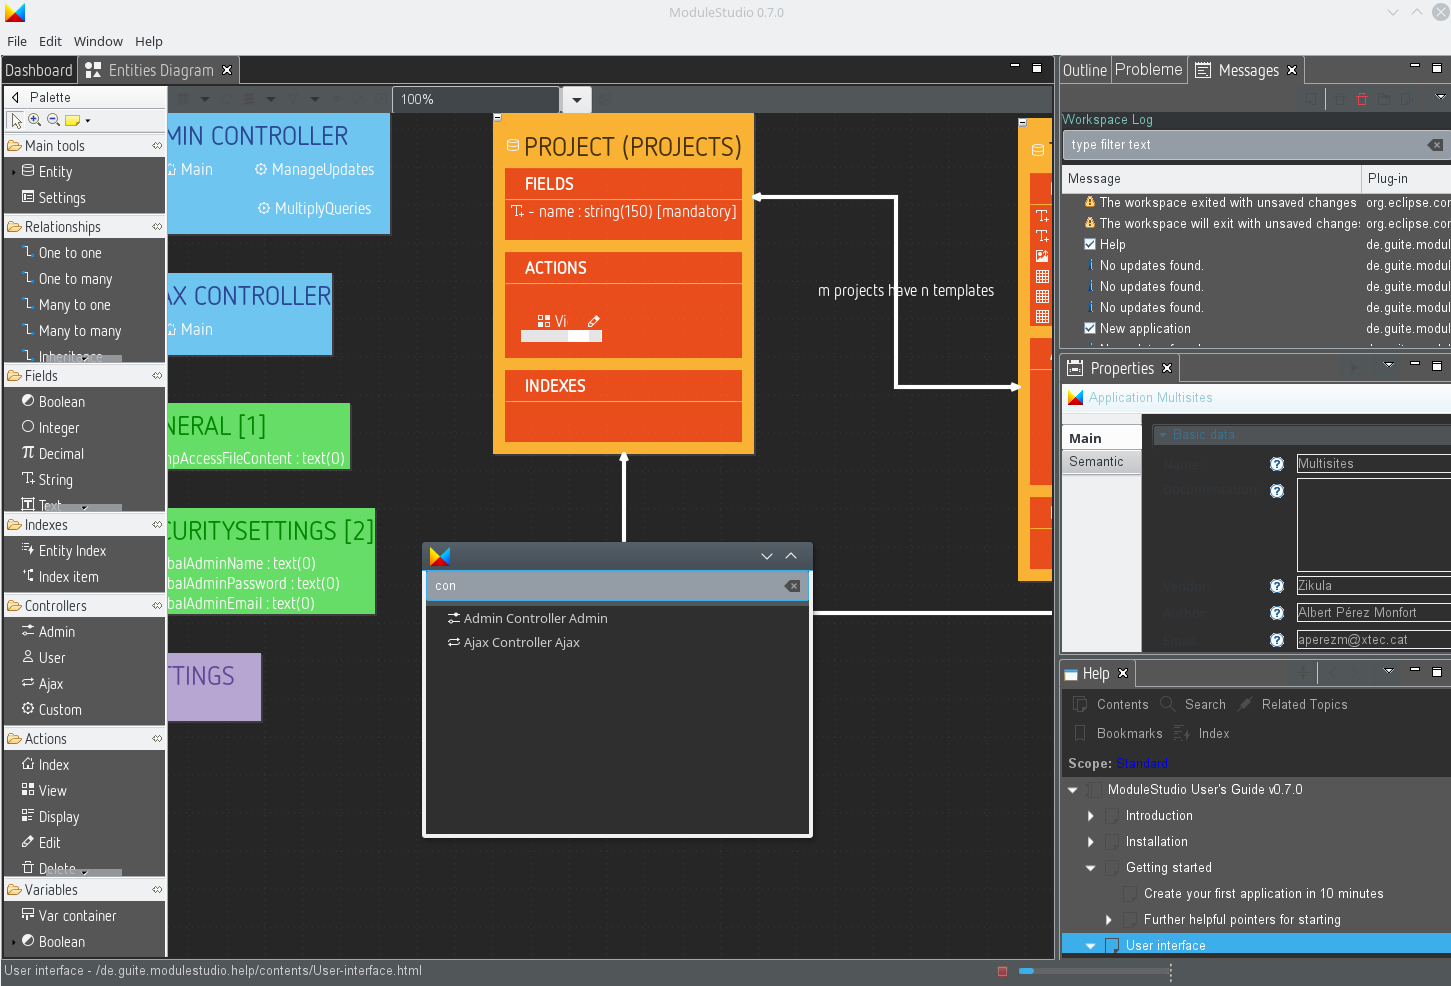
Note that the display may not be correct immediately after switching the theme. So it could be required to exit ModuleStudio and restart it in order to have the new theme setup correctly. Also the dark theme is not fine-tuned yet, it still needs some attention to make it more beautiful. For example some text elements and icons need changed colours to improve readability.
Help menu
The help menu contains actions related to user assistance.
 Manual - Opens the help system.
 Search - Shows the help view and opens the search function in it.
 About - Opens the About dialog.
Help system
While you can browse the entire help using the help view only, you can also open the help system in a dedicated window using the Help > Manual main menu entry. This is particularly useful if you have a small screen and need the available space for the editor.
The help system shows the manual using an internal web browser (you can also use an external instead by changing the preferences accordingly).
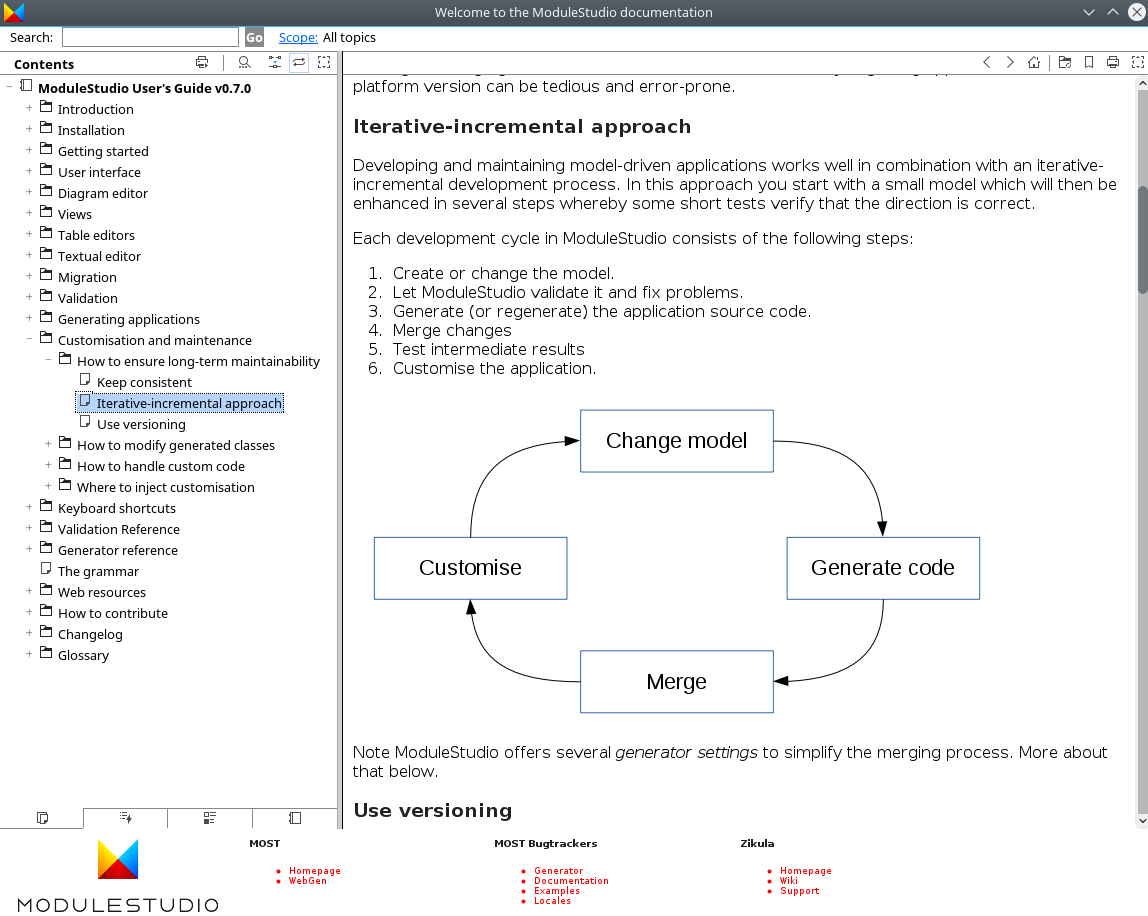
It is worth exploring the functionality offered by this included help. You can not only search for desired topics, there is also a keyword index. Also you can create and manage custom bookmarks for finding interesting sections again with ease.
Main UI components
Since the available editors and views are the most important parts of the ModuleStudio user interface, they are described in dedicated chapters.
- The diagram editor allows for graphical model creation and amendment.
- Several views assist you during your work by providing means for doing specific tasks or showing additional information.
- A textual editor is also available for advanced users.
- Several configuration options can be defined in the preferences.
Customising the UI
Most parts of the user interface can be customised, like one may expect from an Eclipse-based application. Views can be moved and replaced, e.g. you could have them at the left side, on the bottom or in the same tab bar as the editors.
You can also close editors and views by clicking on the cross symbol on the top right of their heading tab. To reopen them again you need to use the corresponding entry of the Window main menu sub menus named Editors and Views. There is one exception: the help view is reopened using the Help main menu.
Also you can minimise and maximise views by using the small icons at their top right corner. If a view is minimised their icons appear in a sidebar at the right of the application window. If you click on such an icon the view appears in a modal until the focus is lost again.
It is even possible to use multiple editors in parallel by arranging them next to each other.
Experiment with these options and use them to meet your personal workflow.
One additional hint about editor synchronisation: If you changed a model, you need to save it to let ModuleStudio reflect the changes in other opened editors.