Validation
This chapter explains the intention behind validation in ModuleStudio.
Introduction
Validation is an essential part of a modelling language. By checking the current model against several constraints it ensures that certain scenarios can not happen in order to avoid problems based on invalid states of model elements.
With the help of validation in ModuleStudio all subsequent components can process the given application model without having to revalidate common concerns.
Having clean and properly validated models is also very helpful for Zikula as a framework because in the long term this leads to a constantly high quality across third party extensions which is traditionally a weak point for every open source system. See this tutorial for more information about this aspect.
The constraints described here are evaluated within the graphical editor as well as during headless generator workflows.
Basic usage
This section gives a brief overview of how validation can be executed and what can be done if problems occur.
Triggering validation
As validation shows what remains to be done in order to generate an application out of a given model, it is essential to provide convenient means for checking validation constraints.
ModuleStudio validates a model every time you save it in the diagram editor. Validation is also executed after an existing model has been opened.
In addition you can always start the validator manually using the main menu or the context menu which might be advantageous to get immediate feedback after having done some amendments in any editors.
Earlier versions of ModuleStudio used to perform a scheduled validation. This has been removed to save performance. However, you can still use the auto save feature to achieve the same behaviour if you like.
Finding and solving problems
Any errors or warnings are shown in the problems view.
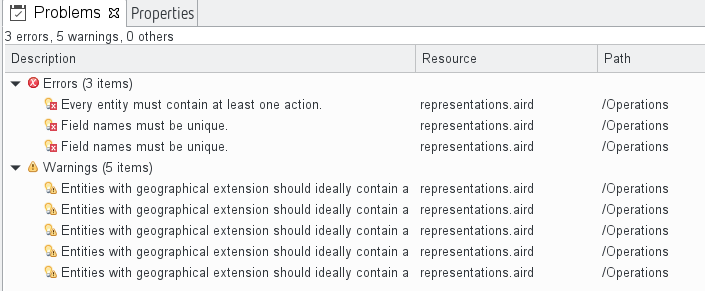
Also error markers appear directly at the elements indicating they have errors.
The problems view has some nice benefits though: first you can double-click on any entry to select the defective element immediately. Second you can right-click on any problem to open a context menu. Beside other functions this offers a Quick fix entry which opens a dialog proposing fixes for the corresponding problem. You can then choose your desired solution and apply it to your model by confirming the dialog. Of course you can also choose another custom solution: the quick fixes are only proposals, but often they can help quickly to get rid of a nasty problem.